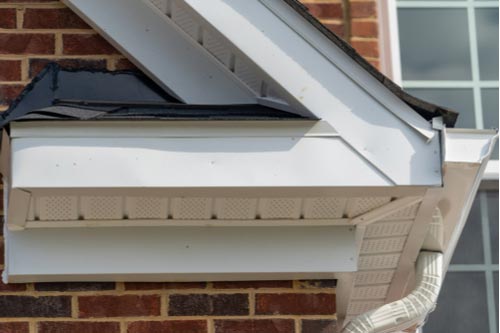
At the point when you have a roof installed at your home, it is essential to guarantee that any water from the roof is steered away from your property. Gutters play a significant part in this. However, it isn’t enough to just install gutters on your roof for rooftop water management. You may also need to install other components, such as a drip edge for water direction.
A drip edge is recommended by numerous local and state regulations for buildings. The International Building Codes for shingles roofs likewise require the use of drip edge for shingles rooftops. Many people don’t know what a drip edge is or why it is significant. Here is a brief glance at how this feature helps with rooftop water management.
What Is A Drip Edge?
A drip edge is basically an L-shaped metal sheet that is installed along the edges of a rooftop. It is especially recommended for shingles roofing where water may leak through the rooftop and into the walls along the edges. The attachment completely covers the edges so that water is directed towards the gutters and has no opening to go towards the fascia. In this way, the drip edge is highly effective at protecting the structural integrity of the fascia and other wooden components used in the roof.
The Right Way to Install a Drip Edge
At the point when you are adding a drip edge to your rooftop, it is critical to have it installed the right way. In the event that the attachment isn’t installed correctly, it may not work well for its purpose and water could end up damaging the rooftop.
Following are a few hints for installing a drip edge:
- Ensure the right length is used. If too many pieces are used in the installation, this creates several seams along the drip edge. With too many seams, the whole purpose of adding a drip edge fails.
- Make sure adjacent pieces overlap. The overlap should be at least 1 to 2 inches to make sure seams are properly sealed.
- The metal flange must be slipped directly under the first row of shingles. This wide flange must be 1 to 2 inches to make sure that no water from the edge of shingles goes under the roof.
- The outer section of the drip edge should overlap a section of the gutter. This creates a water-proof bridge between the attachment and the gutter so that water can’t find a way into the roof.
- You can use cement or roofing nails to fasten the drip edge to the roof structure. It is important to properly secure the drip edge in its place.
- The drip edge must be installed all along the perimeter of the roof for the best results. Care must be taken along the corners to ensure that the sections of the attachment overlap properly to prevent any water-prone seams.
- When you are installing along the seams, the attachment must go under the roof underlayment. When the drip edge has to be installed on the gables, it should ideally go over the underlayment.
Style Choices
With regards to these attachments, you have a lot of choices. Drip edges come in an assortment of shapes and sizes. You can even have a metal shop make a drip edge with custom design and color. In any event, when you are searching for something off-the-shelf, roofing companies can furnish you with colors that match or complement the appearance of your roof. Most people decide to have the color match the gutters, shingles, shutters, or trim of the house.
It is also possible to paint the attachment with your ideal tone. Indeed, applying a layer of paint to it fills in as an extra layer of sealant that protects against water seepage.
Hire Our Reliable Roofers in Atlanta, GA
If you are looking for a dependable roofing company to install gutters or a drip edge, we can help. Here at Atlanta Roofing, our exhaustive scope of services covers attachment installation, gutter installation, and maintenance. We can also assist with the installation, repairs, and upkeep of roofs of all sizes, types, and materials.
Our specialists can help you discover an addition that coordinates with your roof and is tailored to your particular needs. Call us today to enlist our services or get a free quote.


